


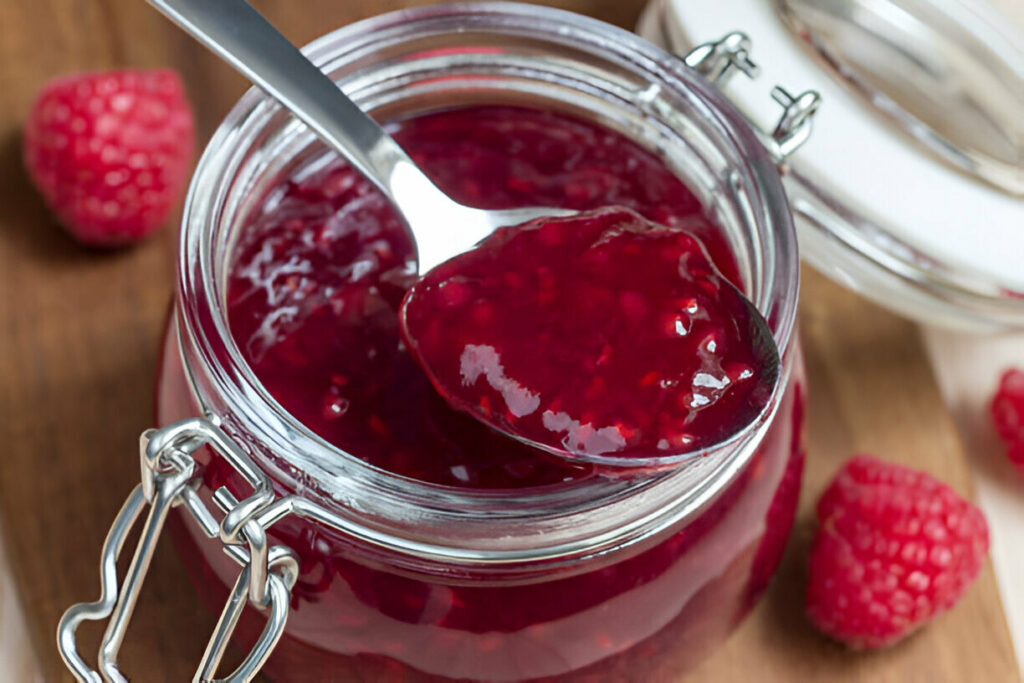
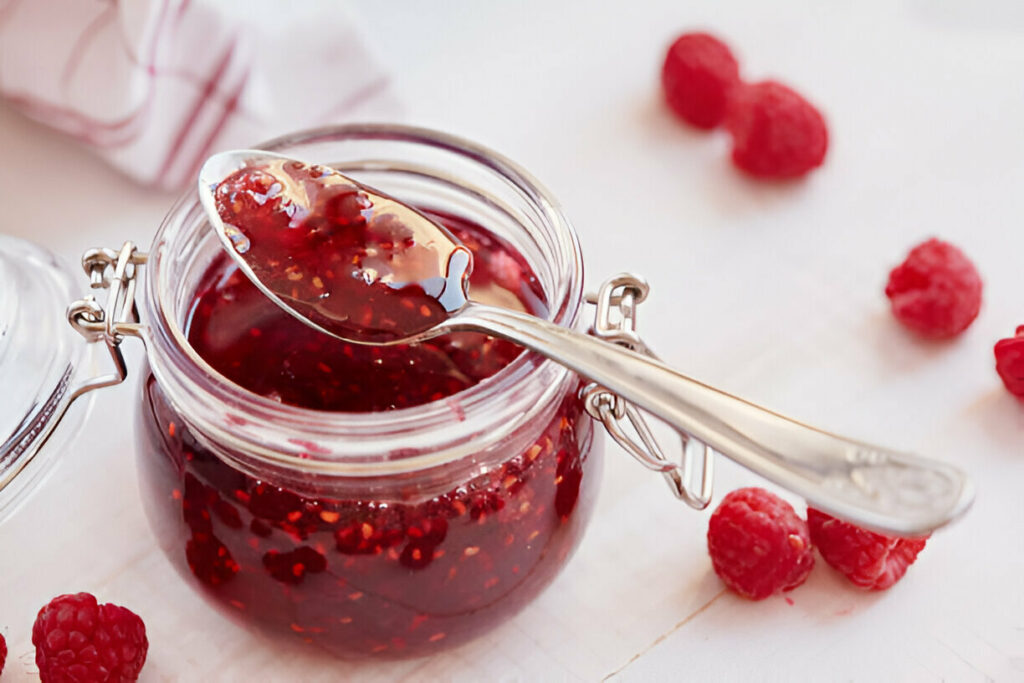
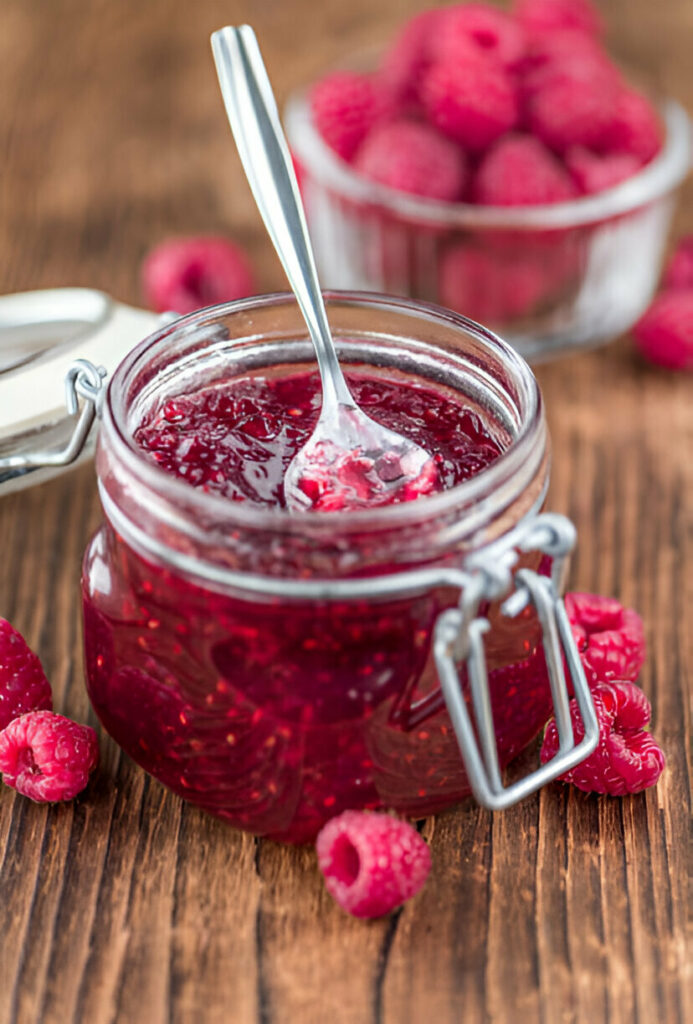
Raspberry chia jam is a simple, vibrant spread that delivers big flavor with just a handful of ingredients. It’s a fuss-free recipe that skips the refined sugar and traditional pectin in favor of a naturally thickened, subtly sweet preserve.
Whether you’re layering it onto toast, swirling it into your oatmeal, or spooning it over creamy yogurt, this jam brings a fresh, fruity burst of flavor to whatever it touches—perfect for quick breakfasts or easy snacking.
Ingredient Breakdown
Raspberries are the heart of this jam, providing their iconic tartness and deep berry flavor. You can use either fresh or frozen raspberries—both break down beautifully when simmered. For fresh berries, choose ones that are firm yet ripe, without any signs of mold or mushiness. If you’re using frozen, there’s no need to thaw them before cooking; just add a few extra minutes to the simmering time.
Honey adds natural sweetness and balances the tart edge of the berries. Its warm, floral notes complement the fruit without overpowering it. Depending on your berries’ ripeness, you may want to adjust the amount slightly to suit your taste.
Chia seeds act as the magical thickening agent in this recipe. As they simmer and then cool, they absorb liquid and form a gel-like consistency that mimics traditional jam—without the need for gelatin or pectin. They also contribute a subtle nuttiness and a light crunch.
Vanilla bean paste brings a fragrant depth to the jam, adding warmth and complexity. Its speckled appearance is a bonus, creating beautiful flecks throughout the vibrant red mixture.
Step-by-Step Preparation Guide
Begin by placing your raspberries, honey, and vanilla bean paste into a small saucepan. Over low heat, allow the mixture to gently simmer for about five minutes. As the berries heat up, they’ll release their juices and soften, creating a glossy, ruby-red base.
Once the raspberries have broken down and the mixture is gently bubbling, stir in the chia seeds. Distribute them evenly by stirring continuously for the first minute or two—they’ll begin absorbing the liquid almost immediately.
Continue simmering the jam for another 10 minutes. During this stage, the chia seeds plump up and the mixture begins to thicken. Stir occasionally to prevent sticking and ensure even cooking.
Once the jam reaches a soft-set consistency, remove the pan from the heat and allow it to cool completely. This resting time is essential—the chia seeds will continue absorbing moisture as the jam cools, resulting in a thick, spoonable spread.
Transfer the cooled jam to a clean, airtight container or sterilised jar. It will keep in the refrigerator for up to one week, maintaining its texture and flavor beautifully.
Recipe Tips
How to adjust sweetness based on berry ripeness
If your raspberries are especially tart, you can add an extra tablespoon of honey after tasting the jam once it’s cooled slightly.
Making a smoother jam: mashing or blending options
For a smoother consistency, mash the berries while cooking or blend the finished jam briefly with an immersion blender.
Flavor variations: adding lemon zest, orange juice, or spices
Try lemon zest for brightness, a splash of orange juice for citrusy depth, or a pinch of cinnamon or cardamom for a warm, spiced profile.
Doubling or halving the recipe: what changes and what stays the same
This recipe scales easily—just be sure to simmer slightly longer if doubling, and always taste as you go when adjusting sweetness or spice.
Ensuring the jam sets: signs it’s thickened properly
The jam should coat the back of a spoon before cooling. It will continue to thicken significantly as it chills.
What to Serve With This Recipe
Toast is a classic canvas—especially sourdough, seeded loaves, or buttered brioche. The jam’s bold flavor cuts through richness and adds brightness to your breakfast.
It’s equally delicious swirled through yogurt or dolloped onto smoothie bowls. Pair it with creamy coconut yogurt or thick Greek-style yogurt for contrast in both flavor and texture.
Use this jam as a filling for thumbprint cookies, linzer tarts, or even baked into jam bars. Its thick texture and vibrant color make it perfect for baking.
For a savory twist, try serving it alongside soft cheeses on a charcuterie board, or slathered inside a grilled brie and arugula sandwich for a touch of sweetness.
Frequently Asked Questions
Can I use other fruits besides raspberries?
Absolutely—this method works beautifully with strawberries, blackberries, blueberries, or even stone fruits like peaches.
How long will it last in the fridge?
When stored in a clean, sealed jar, it keeps well for up to one week in the refrigerator.
Can I freeze chia jam for later?
Yes, chia jam freezes well. Use freezer-safe containers, leaving space at the top. Thaw in the fridge overnight before using.
Do I need to sterilise the jar if eating it within a week?
Not necessarily. A clean, airtight container works fine for short-term storage, but sterilising can extend freshness.
Is it safe to can this jam using traditional methods?
No—chia jam is not suitable for water-bath or pressure canning due to its low sugar content and texture.
Creative Variations
Blend raspberries with blueberries or strawberries for a mixed berry version that layers sweet and tart notes.
Spice it up with a pinch of cinnamon or freshly grated ginger for a jam that pairs beautifully with fall or winter flavors.
Swap the honey for maple syrup or agave nectar for a different kind of sweetness—or to keep it vegan.
For a smoother, seed-free version, simply strain the cooked raspberry mixture through a fine sieve before adding the chia seeds.
This raspberry chia jam is a vibrant, small-batch spread that delivers big flavor with minimal effort. It’s fast, fuss-free, and flexible—ready to add a pop of berry brightness to toast, yogurt, desserts, and more. Once you try it, you’ll want to keep a jar in your fridge at all times.
Ingredients
3 tablespoons honey
3 tablespoons chia seeds
1 teaspoon vanilla bean paste
500g fresh or frozen raspberries
Instructions
Place the raspberries in a small saucepan along with the vanilla bean paste and honey. Set the pan over low heat and gently cook for about 5 minutes, stirring occasionally, until the berries begin to soften and break down into a juicy mixture.
Sprinkle in the chia seeds and stir well to combine. Continue cooking for an additional 10 minutes, allowing the seeds to swell and thicken the jam as it simmers gently.
Remove the pan from the heat and let the jam cool completely. As it cools, it will develop a spreadable, jam-like consistency. Once cooled, transfer the mixture to a clean bowl or a sterilised jar with a tight-fitting lid.
Store in the refrigerator for up to one week. This vibrant, naturally sweetened jam is perfect slathered on toast, stirred into warm porridge, or swirled through creamy yogurt.

Raspberry Chia Jam Recipe
Ingredients
- 3 tablespoons honey
- 3 tablespoons chia seeds
- 1 teaspoon vanilla bean paste
- 500 g fresh or frozen raspberries
Instructions
- Place the raspberries in a small saucepan along with the vanilla bean paste and honey. Set the pan over low heat and gently cook for about 5 minutes, stirring occasionally, until the berries begin to soften and break down into a juicy mixture.
- Sprinkle in the chia seeds and stir well to combine. Continue cooking for an additional 10 minutes, allowing the seeds to swell and thicken the jam as it simmers gently.
- Remove the pan from the heat and let the jam cool completely. As it cools, it will develop a spreadable, jam-like consistency. Once cooled, transfer the mixture to a clean bowl or a sterilised jar with a tight-fitting lid.
- Store in the refrigerator for up to one week. This vibrant, naturally sweetened jam is perfect slathered on toast, stirred into warm porridge, or swirled through creamy yogurt.