


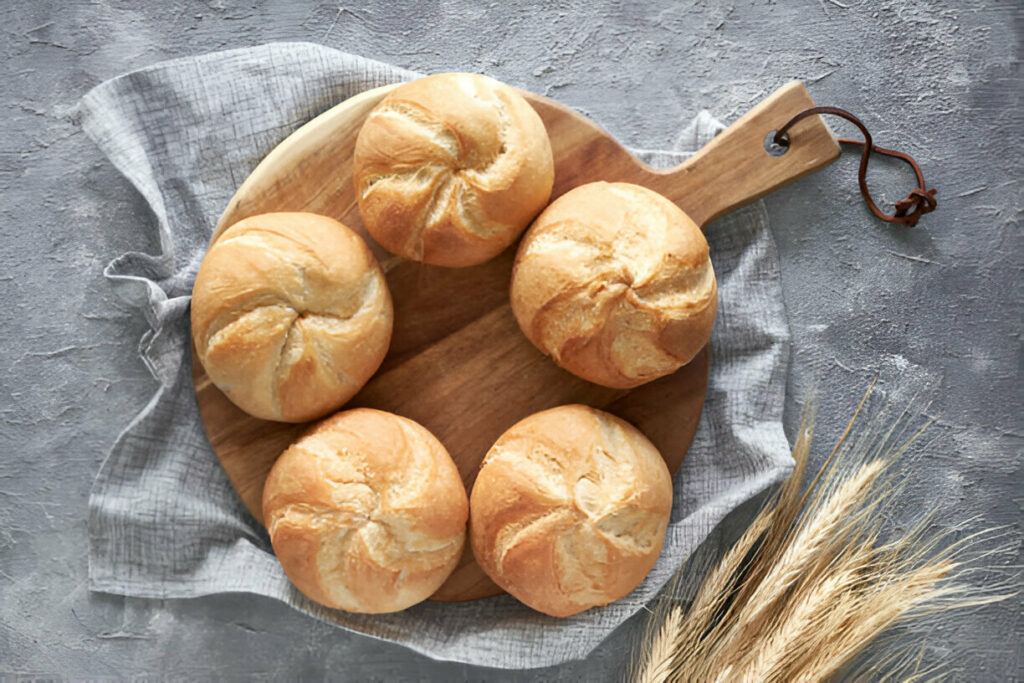
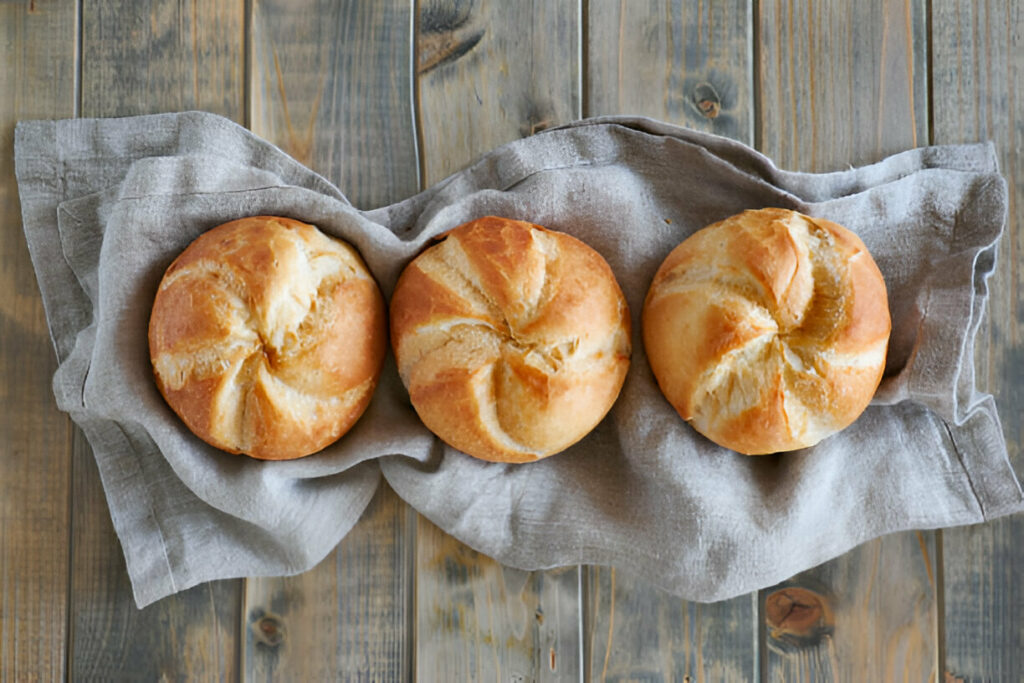
There’s something incredibly satisfying about the crisp exterior and pillowy center of a freshly baked Kaiser roll. These bakery-style buns, with their intricate knot design and golden finish, may look like they require professional-level skills, but they’re surprisingly achievable in a home kitchen. Perfect for sandwiches, breakfast spreads, or simply slathered with butter, Kaiser rolls are a timeless bread worth learning to make from scratch.
Ingredient Breakdown
The magic of Kaiser rolls begins with a handful of everyday ingredients that, when combined with care, yield extraordinary results.
Warm water at 90°F is the foundation—it activates the yeast without killing it and ensures a smooth mixing process. Olive oil enriches the dough, giving it a subtle depth of flavor and a tender bite that separates these rolls from more basic white bread.
Instant yeast offers convenience and reliability, requiring no proofing and blending effortlessly with the dry ingredients. Meanwhile, granulated sugar feeds the yeast and helps with browning, and Diamond Crystal kosher salt rounds out the flavor.
Flour quality matters greatly. Use all-purpose flour with moderate protein content to achieve a balanced chew. Proper measuring is critical; weigh your ingredients for accuracy, as too much flour can stiffen the dough.
For toppings, dried minced onion adds bold flavor and crunch, but sesame seeds, poppy seeds, or everything bagel seasoning are equally delightful variations that let you tailor the rolls to your meal or mood.
Step-by-Step Dough Preparation
Start by blending the flour, salt, sugar, and yeast in the bowl of a stand mixer. Make a well in the center, then pour in the warm water and olive oil. As the dough hook turns, watch as the ingredients transform into a sticky, shaggy dough. This may take a few minutes—scraping the bowl occasionally helps bring everything together.
Kneading is essential. Continue mixing on low speed for five minutes until the dough begins to smooth out. Pause to flip the dough, then knead for another three to five minutes. You’re looking for a dough that’s elastic yet still slightly tacky to the touch, with enough structure to hold its shape.
This kneading builds gluten, giving the rolls their soft yet substantial interior. The slightly sticky texture ensures the rolls don’t become dry during baking, while the elasticity helps them rise and develop that beautiful crust.
Shaping and Proofing the Rolls
Once the dough has doubled in size—about an hour or so—turn it out onto a floured surface and divide it into six equal pieces. Roll each piece into a long, even rope about 20 inches in length.
Creating the classic Kaiser knot requires a bit of handwork: form a loose loop, then weave the ends through and around until they tuck neatly underneath. The design is not only decorative but also practical, creating folds that expand during baking for a textured crust.
For a simpler shape, you can also roll each piece into a tight ball and score the top or press with a Kaiser stamp before baking. Both methods yield beautiful results.
Place the shaped rolls onto a parchment-lined sheet and spray lightly with oil. Cover with plastic wrap, then place a baking sheet on top. This subtle pressure encourages lateral expansion, giving you wide, well-shaped rolls. Let them proof until puffy and doubled in size once again—this usually takes another hour.
Topping and Baking Techniques
Just before baking, brush each roll with milk. While egg wash gives a deeper shine, milk creates a softer, more matte finish that suits the rustic look of Kaiser rolls. It also helps the toppings stick.
Now’s the time to personalize your rolls. Sprinkle dried onion over the tops, or choose from sesame seeds, poppy seeds, or your favorite seasoning blend. If you’ve opted for the round rolls, use a sharp knife to score five or six curved lines radiating from the center, or press with a stamp for the traditional look.
Bake at 400°F for 18 to 20 minutes. Look for a pale golden hue and a hollow sound when tapped on the bottom. Let them cool on the tray briefly, then transfer to a wire rack to finish cooling. The aroma alone is enough to tempt a taste before they’ve fully cooled.
Recipe Tips
How to prevent overly dense or dry rolls:
Ensure your dough remains slightly tacky and avoid over-flouring during shaping.
Ideal proofing environments and temperature control:
A draft-free kitchen corner or a turned-off oven with the light on provides a gentle warmth.
Can this dough be made ahead? Refrigeration and freezing advice:
Yes—let the dough rise once, then refrigerate overnight. You can also freeze shaped, unbaked rolls and thaw before the second rise.
How to scale the recipe for a crowd:
Double or triple all ingredients, but mix in batches to avoid overloading your mixer.
What to Serve With This Recipe
Kaiser rolls shine as the foundation of a hearty sandwich. Stack them with roast beef, turkey, or grilled vegetables, paired with bold condiments and crisp greens.
For breakfast, they pair wonderfully with eggs, melted cheese, and smoky bacon. Toasted and buttered, they rival any bagel or croissant.
Serve them alongside soups and stews—beef barley, tomato basil, or chicken noodle—for a comforting meal. They’re also ideal for soaking up sauces or gravies from a roast dinner.
Smaller-sized versions work beautifully for sliders or gourmet burger buns, perfect for entertaining or casual meals with a touch of flair.
Frequently Asked Questions
Can I use active dry yeast instead of instant yeast?
Yes, but it must be dissolved in warm water first and may slightly increase rise time.
What if I don’t have a Kaiser stamp?
Scoring with a sharp blade in a star pattern works just as well for the signature look.
How do I keep the rolls fresh after baking?
Store in an airtight container at room temperature for up to two days or freeze for longer shelf life.
Can I use whole wheat or bread flour instead of all-purpose?
Yes—bread flour will give more chew, while whole wheat adds earthiness. Adjust hydration slightly if needed.
Why did my rolls not rise properly?
This may be due to inactive yeast, too much flour, or a cold environment slowing fermentation.
These Kaiser rolls bring the aroma and texture of artisan baking into your own kitchen. Their distinctive shape, golden crust, and soft interior make them a satisfying project with rewarding results. Whether you’re serving them warm with butter or crafting the ultimate sandwich, they’re a dependable staple for every occasion.
Ingredients
DOUGH
360 grams water (at 90°F)
30 grams olive oil
600 grams all-purpose flour (plus extra for dusting)
15 grams Diamond Crystal kosher salt
10 grams granulated sugar
6 grams instant yeast
TOPPINGS
1–2 teaspoons milk
1–2 teaspoons dried minced onion (or substitute with sesame seeds, poppy seeds, or everything bagel seasoning)
Instructions
In the bowl of a stand mixer fitted with the dough hook, combine the flour, salt, sugar, and yeast. Whisk together briefly to evenly distribute the dry ingredients. Create a well in the center and pour in the warm water and olive oil. Begin mixing on low speed until a shaggy dough forms and clings together on the dough hook. This might take several minutes—scrape the sides of the bowl as needed to incorporate all the flour.
Continue kneading the dough on low speed for about 5 minutes. The texture should start to smooth out while remaining slightly sticky to the touch. Pause to scrape the dough off the hook, flip it over, and knead for another 3–5 minutes until the dough becomes more elastic and supple, though still a bit tacky.
Shape the dough into a rough ball and transfer it to a lightly greased bowl—reusing the mixer bowl is fine. If the dough clings to your hands, a touch of oil will make handling easier. Cover the bowl with a clean towel or plastic wrap and let it rise at room temperature until it doubles in size, about 1 to 1½ hours.
Once risen, gently press down the dough to release excess air and turn it onto a clean, lightly floured surface. Divide the dough evenly into 6 pieces.
Roll each piece into a rope about 20 inches long. Don’t taper the ends—keep the rope even in thickness. Lightly dust your hands with flour to prevent sticking, then form a loop in the middle of the rope by crossing the ends over each other. Thread one end through the center of the loop, leaving a small opening. Take that same end and wrap it around once more, pulling it back through the middle. Finally, bring the opposite end around the front and push it through the center, tucking both ends underneath the roll.
Alternative Shape: If you prefer to stamp or score your rolls rather than knot them, shape each dough piece into a firm, round ball with the seam tucked underneath. These should be scored or stamped just before baking, after adding toppings.
Arrange the shaped rolls on a parchment-lined baking sheet. Lightly spray the tops with non-stick spray, then cover with plastic wrap. Place another sheet pan directly on top to apply gentle pressure—this helps the rolls spread outward instead of rising too tall. Let the rolls rise again until very puffy and doubled in size, about 1 to 1½ hours.
As the second rise nears completion, begin preheating your oven to 400°F to ensure it’s ready when the dough is fully proofed.
Right before baking, brush the tops of each roll with milk to encourage browning. Sprinkle with dried minced onion or your preferred topping. For round rolls, score 5 to 6 curved lines radiating from the center using a sharp knife or lame. If using a Kaiser stamp, press it firmly into each roll at this stage.
Bake the rolls for 18 to 20 minutes, or until they turn a light golden brown. Once baked, remove from the oven and allow them to cool on the baking tray for 5 minutes before transferring to a wire rack to cool completely.

Kaiser Rolls Recipe
Ingredients
DOUGH
- 360 grams water at 90°F
- 30 grams olive oil
- 600 grams all-purpose flour plus extra for dusting
- 15 grams Diamond Crystal kosher salt
- 10 grams granulated sugar
- 6 grams instant yeast
TOPPINGS
- 1 –2 teaspoons milk
- 1 –2 teaspoons dried minced onion or substitute with sesame seeds, poppy seeds, or everything bagel seasoning
Instructions
- In the bowl of a stand mixer fitted with the dough hook, combine the flour, salt, sugar, and yeast. Whisk together briefly to evenly distribute the dry ingredients. Create a well in the center and pour in the warm water and olive oil. Begin mixing on low speed until a shaggy dough forms and clings together on the dough hook. This might take several minutes—scrape the sides of the bowl as needed to incorporate all the flour.
- Continue kneading the dough on low speed for about 5 minutes. The texture should start to smooth out while remaining slightly sticky to the touch. Pause to scrape the dough off the hook, flip it over, and knead for another 3–5 minutes until the dough becomes more elastic and supple, though still a bit tacky.
- Shape the dough into a rough ball and transfer it to a lightly greased bowl—reusing the mixer bowl is fine. If the dough clings to your hands, a touch of oil will make handling easier. Cover the bowl with a clean towel or plastic wrap and let it rise at room temperature until it doubles in size, about 1 to 1½ hours.
- Once risen, gently press down the dough to release excess air and turn it onto a clean, lightly floured surface. Divide the dough evenly into 6 pieces.
- Roll each piece into a rope about 20 inches long. Don’t taper the ends—keep the rope even in thickness. Lightly dust your hands with flour to prevent sticking, then form a loop in the middle of the rope by crossing the ends over each other. Thread one end through the center of the loop, leaving a small opening. Take that same end and wrap it around once more, pulling it back through the middle. Finally, bring the opposite end around the front and push it through the center, tucking both ends underneath the roll.
- Alternative Shape: If you prefer to stamp or score your rolls rather than knot them, shape each dough piece into a firm, round ball with the seam tucked underneath. These should be scored or stamped just before baking, after adding toppings.
- Arrange the shaped rolls on a parchment-lined baking sheet. Lightly spray the tops with non-stick spray, then cover with plastic wrap. Place another sheet pan directly on top to apply gentle pressure—this helps the rolls spread outward instead of rising too tall. Let the rolls rise again until very puffy and doubled in size, about 1 to 1½ hours.
- As the second rise nears completion, begin preheating your oven to 400°F to ensure it’s ready when the dough is fully proofed.
- Right before baking, brush the tops of each roll with milk to encourage browning. Sprinkle with dried minced onion or your preferred topping. For round rolls, score 5 to 6 curved lines radiating from the center using a sharp knife or lame. If using a Kaiser stamp, press it firmly into each roll at this stage.
- Bake the rolls for 18 to 20 minutes, or until they turn a light golden brown. Once baked, remove from the oven and allow them to cool on the baking tray for 5 minutes before transferring to a wire rack to cool completely.
Notes
- If the round rolls rise into domed tops in the oven, gently place a sheet pan on top of them right after baking to flatten them slightly for a more burger bun-like shape.
- Do not apply pressure—the weight of the sheet pan alone will do the job.
- When using a Kaiser roll stamp, brush the rolls with milk first, then stamp the tops, and finally sprinkle with the onion topping.
- If the stamp sticks or doesn’t release cleanly, spray it with non-stick spray before each use.
- For a darker, crisper crust, extend the bake time by an additional 3–5 minutes.