


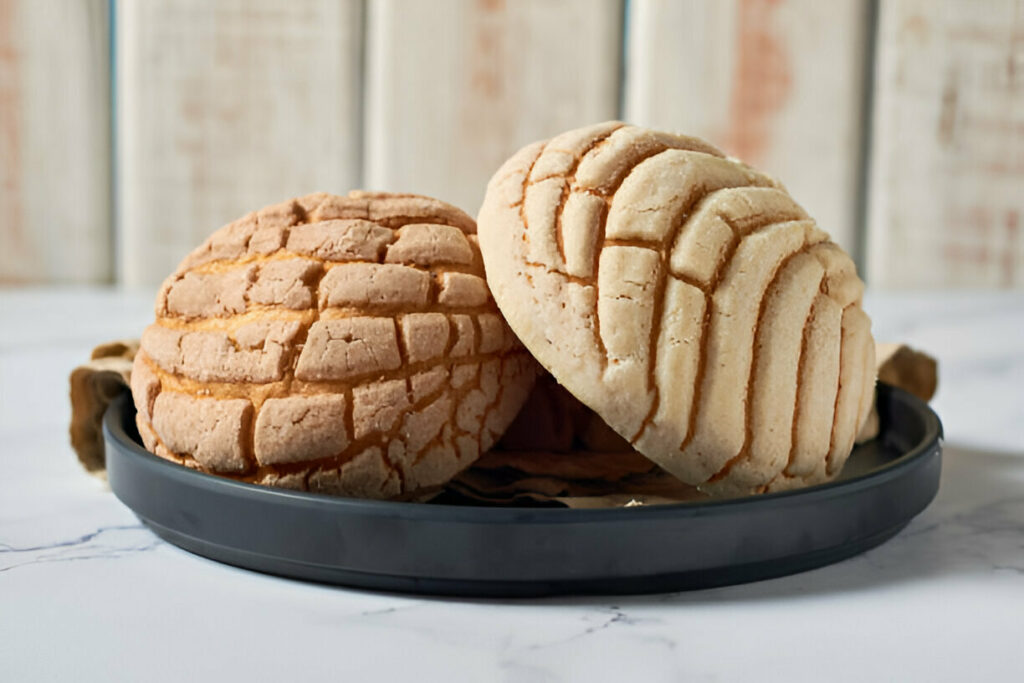
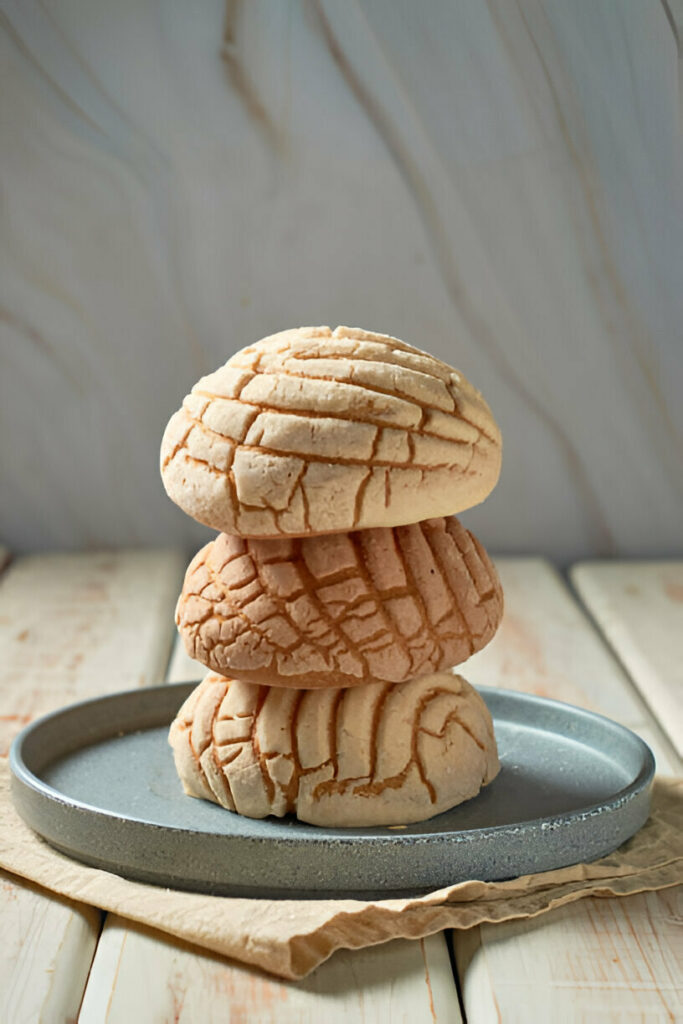
Soft, fragrant, and topped with a delicate, sugary crust that cracks just so, Concha bread is a treasured staple in Mexican bakeries. These sweet rolls, named after their seashell-like design, offer a delightful contrast in texture—fluffy and tender on the inside, with a subtly crisp, sugary topping that melts on the tongue.
Ingredient Breakdown
The soul of a concha lies in its balance between soft dough and crackly topping. Each element plays a specific role in the final texture and flavor.
The dough begins with active dry yeast, gently bloomed in warm milk and sweetened with a touch of sugar to kickstart fermentation. Whole milk enriches the dough, lending it a soft crumb and golden hue, while four large eggs add structure and richness. All-purpose flour gives the dough body, and unsalted butter, added piece by piece, ensures a silky, luxurious texture. A pinch of kosher salt helps balance the sweetness and strengthen the gluten structure.
The topping, in contrast, leans sweet and crumbly. Powdered sugar melts into the flour and vegetable shortening to form a thick, spreadable paste. A splash of vanilla extract provides aroma, while a bit of cocoa powder adds depth and variation when desired. A light dusting of flour and a pinch of salt bring everything into harmony.
To achieve the classic look and feel of conchas, certain tools help elevate the process. A stand mixer with a dough hook streamlines kneading and butter incorporation, while a whisk attachment is ideal for preparing the topping. For the decorative shell design, a concha mold provides the iconic scalloped pattern, though a sharp knife lightly floured can also do the job.
Step-by-Step Dough Preparation
Perfecting the dough starts with proper yeast activation. Warm the milk just until it’s pleasant to the touch—around 105°F—and stir in the yeast with a teaspoon of sugar. After five minutes, a frothy layer will signal that the yeast is alive and ready.
In a large mixing bowl, whisk together the dry ingredients—flour, sugar, and salt. Once the yeast mixture is foamy, combine it with the beaten eggs and stir until a rough dough begins to form.
At this point, attach the bowl to a stand mixer and let the dough hook do the heavy lifting. Knead on medium-low for 10 to 12 minutes. If the dough sticks too much, sprinkle in a tablespoon of flour at a time. The end result should be elastic, smooth, and firm enough to handle additional butter.
Add the butter gradually—one cube at a time—giving each piece time to fully incorporate. The dough may look like it’s falling apart, but persistence pays off. Eventually, it transforms into a shiny, supple ball. Scrape down the sides of the bowl when necessary to keep things moving.
On a clean surface, gently form the dough into a square. Fold each corner into the center, flip the dough over, and shape it into a tight, smooth ball. Transfer to a greased bowl, cover with plastic wrap, and let it rest in a warm, draft-free spot until it doubles in volume—about one hour.
Creating the Signature Topping and Assembling the Rolls
While the dough rises, prepare the topping. In the mixer, blend flour, powdered sugar, shortening, cocoa powder (if using), vanilla, and salt. Start on low speed to combine, then whip on medium until the topping becomes smooth and spreadable.
Once the dough has doubled, gently punch it down and divide it into 12 equal portions. Roll each into a taut, round ball, and arrange them evenly across two parchment-lined baking sheets.
Scoop out two heaping tablespoons of the topping and, using slightly damp hands, flatten it into a 3-inch disc. Carefully place each disc over a dough ball, pressing lightly to adhere without flattening the dough. Leave a slim border around the base to allow for expansion.
For that classic shell appearance, press a floured concha mold firmly onto the topping. Alternatively, score curved lines into the surface with a floured knife, taking care not to cut too deeply. Let the assembled conchas rise once more until puffed by about a third—another hour or so.
Preheat the oven to 350°F and position the racks in the upper and lower thirds. Bake the conchas for 20 to 22 minutes, rotating the trays halfway through. When finished, the rolls should be golden and risen, with toppings gently cracked. Cool completely on a wire rack before serving.

Recipe Tips & Frequently Asked Questions
Common dough challenges and how to fix them
If the dough is too sticky while kneading, gradually add more flour. If it’s dry or cracking, it may need a splash of warm milk. Ensure all ingredients are at room temperature for a smoother process.
Secrets to getting a crisp yet tender topping
Achieve the perfect contrast by using the right ratio of shortening to sugar and not overbaking. The topping should set during baking but not become hard.
Make-ahead tips: How to prep the dough or topping in advance
You can prepare the dough a day ahead and let it rise overnight in the refrigerator. The topping can be made and stored in the fridge for up to 2 days. Let both come to room temperature before using.
Best practices for even baking and golden color
Rotate trays halfway through baking to ensure even browning. Avoid crowding the rolls on the baking sheet, as they need space to rise and bake uniformly.
Can I use instant yeast instead of active dry?
Yes. Skip the blooming step and mix the instant yeast directly into the dry ingredients.
Why did my topping crack too much or fall off?
Toppings may crack excessively if rolled too thin or too thick. Ensure a consistent 3-inch disc and press gently but securely onto the dough.
How do I store conchas and keep them soft?
Store cooled conchas in an airtight container at room temperature for up to 3 days. To refresh, microwave for 10 seconds.
Can I freeze the dough or baked conchas?
Yes. Freeze unbaked dough balls and topping separately. Thaw, assemble, and bake as directed. Baked conchas can also be frozen and thawed at room temperature.
What’s the best way to make them without a stand mixer?
Knead by hand for 15 to 20 minutes, being patient with butter incorporation. Use a sturdy spoon for the topping.
What to Serve With This Recipe
Conchas are a delightful match for warm, comforting drinks. Dip one into café con leche, hot chocolate, or even spiced atole for a true Mexican breakfast experience.
As an afternoon treat, pair conchas with fresh tropical fruit, sweetened cream, or dulce de leche for contrast.
They’re also wonderful slathered with softened butter, fruit jam, or Nutella, adding even more richness to each bite.
Creative Variations
For a flavorful twist, swirl vanilla and cocoa toppings together for a marbled effect.
Celebrate special occasions with pastel-colored toppings, using food coloring to create vibrant pink, yellow, or green designs reminiscent of traditional panaderías.
Make mini conchas by dividing the dough into smaller portions—perfect for parties, gifts, or portion-controlled snacks.
Concha bread is more than a baked good—it’s a sensory experience, a moment of calm in the kitchen, and a celebration of tradition. With its tender, buttery dough and delightfully crisp topping, each bite offers comfort and nostalgia. Creating these at home brings the warmth of a Mexican panadería straight to your table, one roll at a time.
Ingredients
Dough
4 large eggs, lightly beaten
2 teaspoons kosher salt
1/2 cup (1 stick) unsalted butter, cut into 16 pieces, at room temperature, plus more for greasing the bowl
2/3 cup whole milk
1/4 cup plus 1 teaspoon granulated sugar
4 to 4 1/2 cups all-purpose flour
1 (1/4-ounce) packet active dry yeast (2 1/4 teaspoons)
Topping and Assembly
1 cup powdered sugar
2 tablespoons unsweetened cocoa powder (optional)
3/4 cup vegetable shortening
2 teaspoons pure vanilla extract
1 cup all-purpose flour, plus more for dusting during assembly
Pinch of kosher salt
Instructions
Dough
Warm the milk in a small saucepan over medium heat until just heated through—about 1 minute. The ideal temperature is around 105°F, warm but not scalding. Pour the milk into a liquid measuring cup and stir in the yeast along with 1 teaspoon of granulated sugar. Allow it to rest until the surface becomes foamy and bubbly, about 5 minutes.
In the bowl of a stand mixer, whisk together 4 cups of the flour, kosher salt, and the remaining 1/4 cup of sugar. Once the yeast mixture is ready, pour it into the bowl along with the lightly beaten eggs. Use a wooden spoon or rubber spatula to stir until a rough, shaggy dough forms.
Secure the bowl to the stand mixer fitted with the dough hook. Mix on medium-low speed, watching for the dough to pull away from the bowl. If the dough remains sticky and clings to the bottom, add extra flour one tablespoon at a time until it becomes smooth, elastic, and stiff. This stage should take 10 to 12 minutes.
With the mixer still running, gradually add the butter one piece at a time. Ensure each piece is fully absorbed before introducing the next. The dough might appear to separate or look ragged at first, but continue mixing. Scrape down the bowl as needed, and after roughly 10 more minutes, the dough will transform into a smooth and flexible mass.
Lightly butter a medium mixing bowl. Transfer the dough onto a clean surface and gently shape it into a square. Bring each corner toward the center, pressing them to meet, then flip the dough over and roll it into a tight, sealed ball. Place it in the prepared bowl, cover tightly with plastic wrap, and let it rise in a warm, draft-free area until it nearly doubles in volume—about 1 hour.
Topping and Assembly
In a stand mixer fitted with the whisk attachment, combine the all-purpose flour, powdered sugar, shortening, cocoa powder (if using), vanilla extract, and salt. Start on low speed until the ingredients are incorporated, then increase to medium speed and beat until the mixture reaches a smooth, frosting-like consistency—this takes about 1 minute.
Line two baking sheets with parchment paper. Turn the risen dough onto a clean work surface and divide it into 12 equal portions. Roll each piece gently into a smooth ball and space them evenly on the baking sheets, six per tray.
Using slightly damp hands, scoop around 2 heaping tablespoons of the topping and shape it into a 3-inch disc. Carefully drape each disc over a dough ball, smoothing it gently with your fingers and leaving about 1/4 inch of uncovered dough around the bottom edge. Repeat until all rolls are topped.
Dust a 4-inch concha mold lightly with flour and tap off the excess. Press the mold firmly over each topping, tilting it slightly to ensure a deep, defined impression. If a mold isn’t available, use a floured sharp knife to score the surface in your preferred design. Allow the rolls to rise again until puffed by about one-third, which should take approximately 1 hour.
As the conchas finish rising, position two oven racks in the upper and lower thirds and preheat the oven to 350°F. Bake the conchas for 20 to 22 minutes, rotating the trays halfway through for even baking. They should be golden and slightly firm to the touch. Transfer to a wire rack and let cool completely before serving.

Concha Bread Recipe
Ingredients
Dough
- 4 large eggs lightly beaten
- 2 teaspoons kosher salt
- 1/2 cup 1 stick unsalted butter, cut into 16 pieces, at room temperature, plus more for greasing the bowl
- 2/3 cup whole milk
- 1/4 cup plus 1 teaspoon granulated sugar
- 4 to 4 1/2 cups all-purpose flour
- 1 1/4-ounce packet active dry yeast (2 1/4 teaspoons)
Topping and Assembly
- 1 cup powdered sugar
- 2 tablespoons unsweetened cocoa powder optional
- 3/4 cup vegetable shortening
- 2 teaspoons pure vanilla extract
- 1 cup all-purpose flour plus more for dusting during assembly
- Pinch of kosher salt
Instructions
Dough
- 4 large eggs, lightly beaten
- 2 teaspoons kosher salt
- 1/2 cup (1 stick) unsalted butter, cut into 16 pieces, at room temperature, plus more for greasing the bowl
- 2/3 cup whole milk
- 1/4 cup plus 1 teaspoon granulated sugar
- 4 to 4 1/2 cups all-purpose flour
- 1 (1/4-ounce) packet active dry yeast (2 1/4 teaspoons)
Topping and Assembly
- 1 cup powdered sugar
- 2 tablespoons unsweetened cocoa powder (optional)
- 3/4 cup vegetable shortening
- 2 teaspoons pure vanilla extract
- 1 cup all-purpose flour, plus more for dusting during assembly
- Pinch of kosher salt