


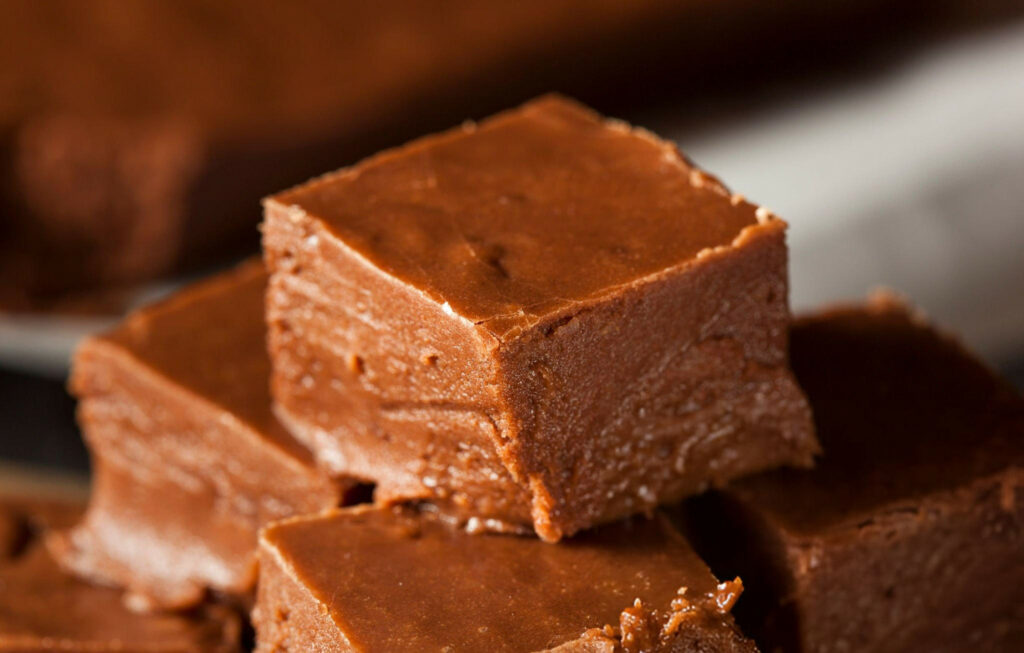
Temptingly rich and irresistibly smooth, this classic chocolate fudge recipe is a foolproof treat for any occasion. Whether you’re crafting sweet gifts, rounding out a holiday dessert spread, or simply craving a decadent square of cocoa bliss, this fudge delivers comfort and indulgence in every bite. With its deep chocolate flavor and velvety texture, it’s the kind of treat that disappears quickly and leaves a lasting impression.
Ingredient Breakdown
Whole milk and butter are foundational to this recipe, delivering the creamy base that gives fudge its luxurious mouthfeel. The milk brings gentle moisture and richness, while butter contributes silkiness and depth. Used both in the cooking process and at the finish, butter also softens the texture, creating a smooth, almost melt-in-your-mouth bite.
Granulated sugar plays a structural role, forming the crystalline matrix essential to the fudge’s set. As it dissolves and caramelizes slightly during boiling, it creates the firm-yet-pliable consistency that defines successful fudge. Without the correct sugar ratio and temperature control, the mixture would either fail to set or turn into brittle candy.
Cocoa powder offers an intense, earthy flavor, giving the fudge its robust chocolatey core. Unlike melted chocolate, cocoa powder is unsweetened and more concentrated, making it ideal for controlling both sweetness and bitterness. It harmonizes beautifully with the sugar and dairy, giving a balanced richness without overpowering.
Vanilla extract, added at the end of the cooking process, lifts the entire flavor profile. Its aromatic compounds round off the edges of the chocolate and enhance the sweetness without adding more sugar. A good quality vanilla can make a noticeable difference in the final aroma and aftertaste.
A pinch of kosher salt is the final touch of brilliance. It tempers the sweetness, sharpens the cocoa flavor, and brings out the subtleties of the dairy and vanilla. The coarser grain of kosher salt also disperses gently, leaving behind a whisper of salinity that makes each bite more satisfying.
Step-by-Step Preparation Guide
Begin by creating an efficient and organized workspace. Butter your baking dish generously and place it within reach. Prepare a glass of ice water and fill the sink with a few inches of cold water—both will be used later to test and cool the fudge. Having these elements ready ensures a smooth and focused cooking process without distraction.
In your heavy-bottomed saucepan, combine the milk, sugar, cocoa powder, and salt. Whisk until the mixture is mostly uniform. Don’t worry about slight clumps; they will dissolve with heat. The key is to avoid dry pockets that might lead to uneven cooking.
Heat the pan over medium-low and bring the mixture to a steady boil. Stir occasionally with a heatproof spatula, but avoid constant movement, which can cause crystallization. Maintain a consistent flame to ensure slow, even heating. High heat may burn the sugar or milk solids, compromising texture and flavor.
Watch for the transformation in the bubbling pattern. Initially, the mixture will boil with large, irregular bubbles. As water evaporates and the sugar concentration rises, smaller and tighter bubbles will form. This visual cue indicates that the fudge is nearing the soft-ball stage. Use a thermometer to confirm a temperature of 235°F, or use the classic spoon test—drizzle a bit into your ice water; if it forms a soft, pliable ball between your fingers, it’s ready.
Turn off the heat and immediately stir in the butter and vanilla. Gently mix until the butter melts and is fully incorporated. Next, carefully lower the saucepan into the cold water bath, avoiding any splashes. This rapid cooling halts the cooking process and prepares the mixture for beating. Using a wooden spoon or spatula, beat vigorously until the fudge thickens slightly and starts to lose its glossy sheen. This step introduces fine sugar crystals for a creamy texture.
Pour the thickened mixture into your greased pan. It should settle smoothly on its own. Let it cool at room temperature for at least 30 minutes. Once firm, use a sharp, thin knife to cut into squares. Dipping the blade in hot water between cuts ensures clean, even edges without crumbling.
Recipe Tips & Frequently Asked Questions
Avoiding grainy fudge: common mistakes and how to fix them
Graininess often stems from over-stirring while the fudge is boiling or from sugar crystals forming on the sides of the pan. Use a wet pastry brush to wipe down the sides during cooking and stir sparingly.
How to use the soft-ball test if you don’t have a thermometer
Drop a small spoonful of boiling fudge into a cup of ice water. If it forms a soft ball that flattens slightly when picked up, the fudge is at the right stage.
The importance of pan choice and utensil materials
Use a thick-bottomed saucepan to prevent hot spots and burning. A silicone spatula or wooden spoon is ideal, as metal utensils can conduct heat too quickly and affect consistency.
Storing tips to maintain freshness and texture
Store fudge in an airtight container at room temperature for up to a week. If refrigerating, place parchment between layers to avoid sticking. For longer storage, freeze well-wrapped portions for up to three months.
Why did my fudge not set properly?
The mixture likely didn’t reach the correct temperature. Undercooked fudge won’t solidify and may stay gooey or syrupy.
Can I use plant-based milk instead of whole milk?
Yes, though results may vary. Choose creamy varieties like coconut or oat milk for better texture and richness.
How long does homemade fudge last?
It stays fresh for up to a week at room temperature or two to three weeks refrigerated. Always store in an airtight container.
Is it necessary to beat the fudge after boiling?
Yes. Beating helps create tiny sugar crystals, giving the fudge its signature creamy texture. Skipping this step can lead to a dense or gritty result.
What to Serve With This Recipe
This chocolate fudge pairs beautifully with a strong cup of coffee or a warm mug of tea, offering a luxurious contrast between bold bitterness and velvety sweetness. For a cozier treat, serve with creamy hot chocolate and a dollop of whipped cream.
To brighten the richness, consider plating fudge squares with fresh raspberries, sliced strawberries, or a sprinkle of lemon zest. The acidity adds a welcome freshness that cuts through the deep cocoa flavor.
For entertaining, include the fudge on a dessert board alongside buttery shortbread cookies, salted caramel bites, and candied nuts. It complements a wide array of textures and flavor profiles, making it a standout on any sweets spread.
Creative Variations
Infuse a swirl of peanut butter into the warm fudge before it sets for a salty-sweet combination. Caramel ribbons or marshmallow fluff also create irresistible pockets of flavor.
For added texture, stir in chopped walnuts, pecans, or toasted hazelnuts just before pouring the fudge into the pan. Their crunch balances the smooth base and adds visual appeal.
Make the fudge festive with a topping of crushed candy canes, dried cherries, or colorful sprinkles. These additions are especially popular for holiday treats and themed gift boxes.
A batch of homemade chocolate fudge is simple to master and endlessly versatile. With just a handful of ingredients and a little technique, this classic treat transforms into a melt-in-your-mouth delight. Whether enjoyed alone or shared with others, it’s a timeless confection that never fails to satisfy.

Ingredients
1 cup whole milk
2 tablespoons unsalted butter, plus extra for greasing the pan
2 teaspoons vanilla extract
2 cups granulated sugar
1/4 cup unsweetened cocoa powder
1/2 teaspoon kosher salt
Instructions
Lightly grease a baking dish with butter and set it aside. Fill a glass with ice water and place it near your stovetop. Prepare your sink by filling it with a few inches of cold water—this will be used later to cool the fudge quickly.
In a heavy-bottomed saucepan, combine the milk, sugar, cocoa powder, and salt. Whisk thoroughly until the mixture is mostly smooth; a few small lumps are fine as they’ll dissolve once heated.
Set the saucepan over medium-low heat and allow the mixture to come to a steady boil. Stir intermittently with a heat-resistant spatula, but avoid frequent stirring, which can lead to a gritty texture. Keep the flame low and consistent to prevent the bottom from burning.
Let the mixture boil gently for around 10 minutes. During this time, the texture will begin to change. You’ll notice larger bubbles give way to a uniform field of smaller, tighter ones—this is your cue to start testing.
To check for doneness, use a candy thermometer—when it hits 235°F, it’s ready. If you prefer the traditional method, let a small spoonful drip into the ice water. If it forms a soft and malleable ball, the fudge has reached the soft-ball stage and is good to go.
Remove the saucepan from the heat and immediately stir in the vanilla extract and butter. Stir gently to combine. Carefully transfer the pan to the sink, setting it into the cold water bath without letting water splash into the fudge. It may sizzle slightly. Hold the pot securely and beat the mixture with a wooden spoon or heatproof spatula until it thickens slightly and begins to lose its glossy sheen.
Quickly pour the mixture into the prepared baking dish. It should spread out evenly on its own. Let it sit undisturbed at room temperature until fully cooled—about 30 minutes.
Once the fudge is firm, slice it using a sharp, thin-bladed knife. For cleaner cuts, dip the blade in hot water and dry it before each slice.

Chocolate Fudge Recipe
Ingredients
- 1 cup whole milk
- 2 tablespoons unsalted butter plus extra for greasing the pan
- 2 teaspoons vanilla extract
- 2 cups granulated sugar
- 1/4 cup unsweetened cocoa powder
- 1/2 teaspoon kosher salt
Instructions
- Lightly grease a baking dish with butter and set it aside. Fill a glass with ice water and place it near your stovetop. Prepare your sink by filling it with a few inches of cold water—this will be used later to cool the fudge quickly.
- In a heavy-bottomed saucepan, combine the milk, sugar, cocoa powder, and salt. Whisk thoroughly until the mixture is mostly smooth; a few small lumps are fine as they’ll dissolve once heated.
- Set the saucepan over medium-low heat and allow the mixture to come to a steady boil. Stir intermittently with a heat-resistant spatula, but avoid frequent stirring, which can lead to a gritty texture. Keep the flame low and consistent to prevent the bottom from burning.
- Let the mixture boil gently for around 10 minutes. During this time, the texture will begin to change. You’ll notice larger bubbles give way to a uniform field of smaller, tighter ones—this is your cue to start testing.
- To check for doneness, use a candy thermometer—when it hits 235°F, it’s ready. If you prefer the traditional method, let a small spoonful drip into the ice water. If it forms a soft and malleable ball, the fudge has reached the soft-ball stage and is good to go.
- Remove the saucepan from the heat and immediately stir in the vanilla extract and butter. Stir gently to combine. Carefully transfer the pan to the sink, setting it into the cold water bath without letting water splash into the fudge. It may sizzle slightly. Hold the pot securely and beat the mixture with a wooden spoon or heatproof spatula until it thickens slightly and begins to lose its glossy sheen.
- Quickly pour the mixture into the prepared baking dish. It should spread out evenly on its own. Let it sit undisturbed at room temperature until fully cooled—about 30 minutes.
- Once the fudge is firm, slice it using a sharp, thin-bladed knife. For cleaner cuts, dip the blade in hot water and dry it before each slice.