
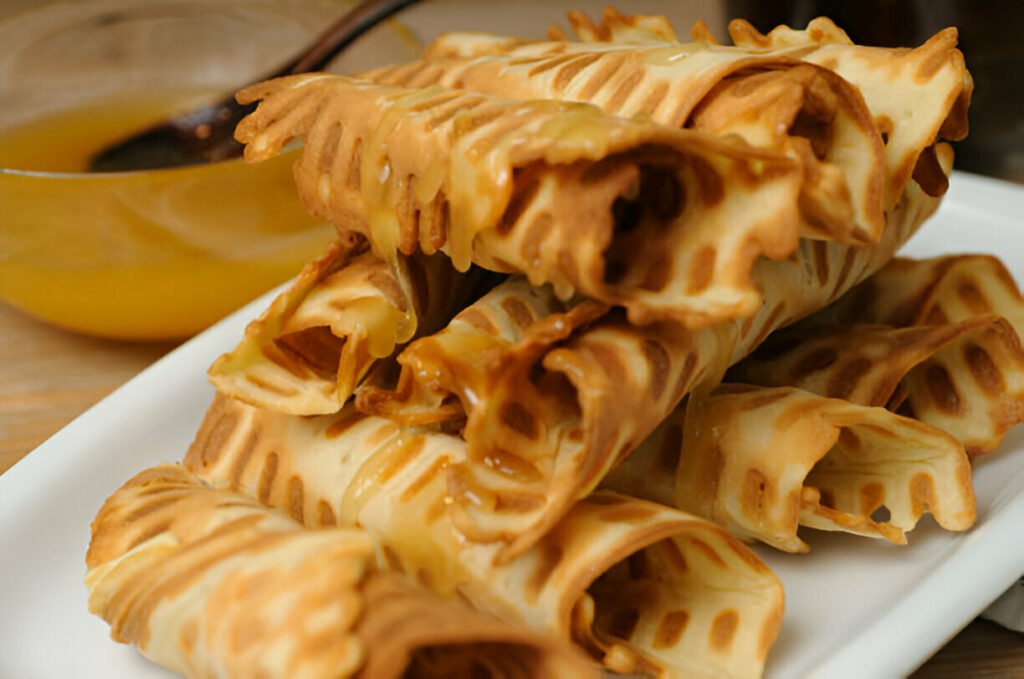
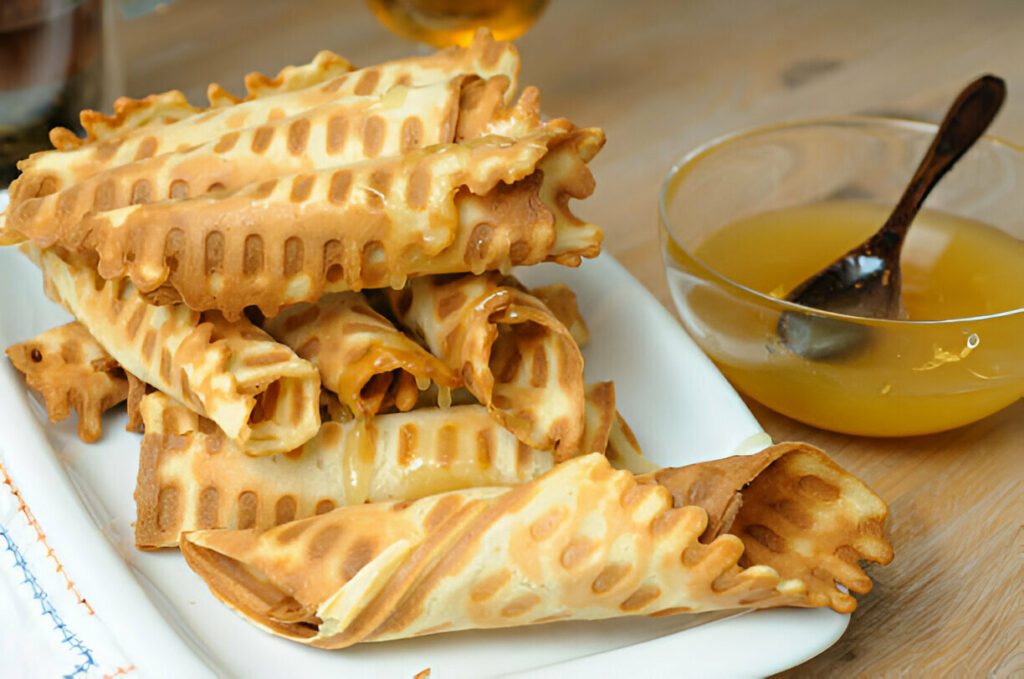
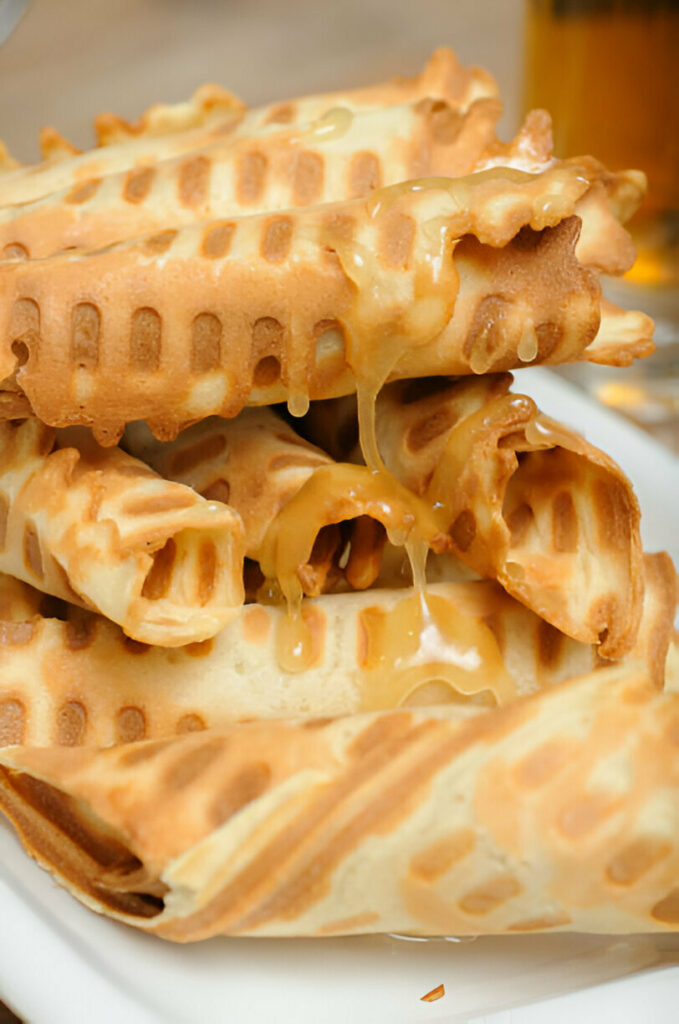
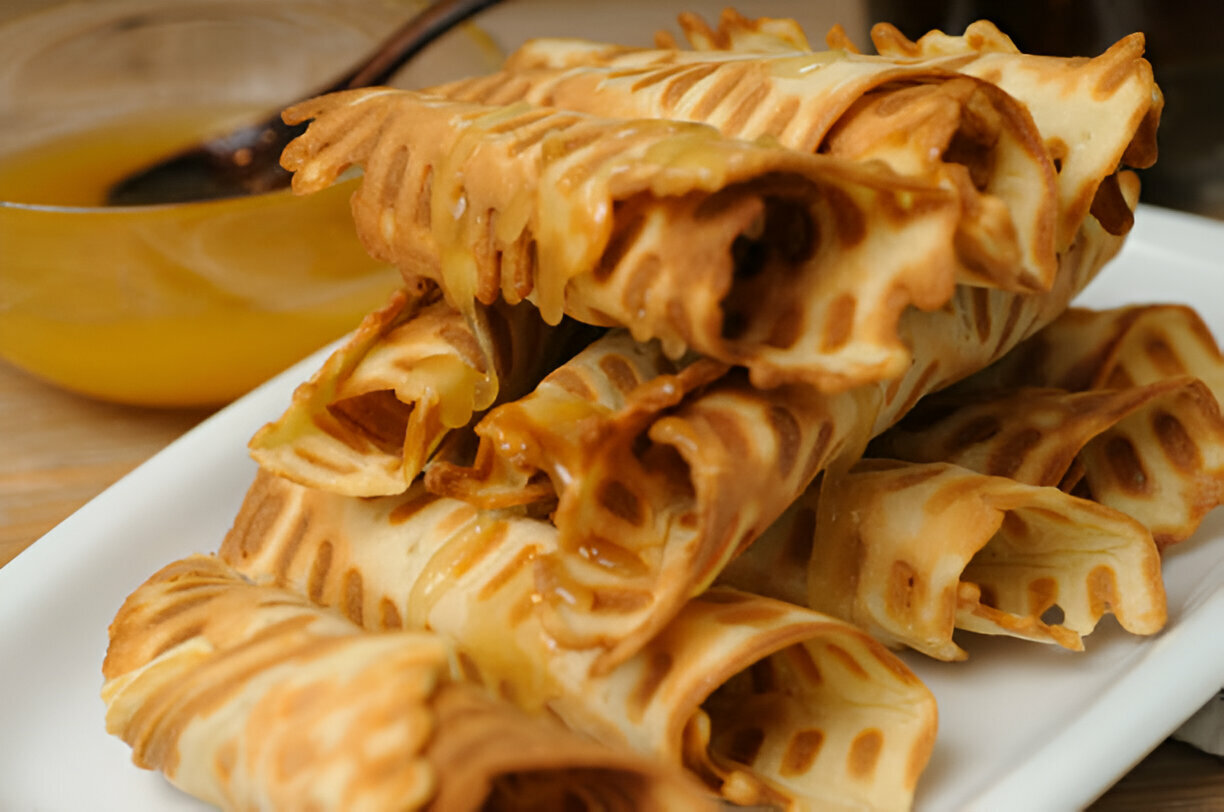
Crisp Wafer Rolls Recipe
Crisp Wafer Rolls deliver an elegant snap and delicate sweetness, making them a perfect treat for any occasion. With their lightweight texture and golden finish, they strike a balance between sophistication and simplicity, creating a dessert that’s both visually appealing and wonderfully satisfying.
Ingredient Breakdown
The magic of these wafer rolls begins with the eggs and sugar. When beaten together properly, they create a light, airy foundation that ensures the wafers are tender yet crisp. The air incorporated during mixing is crucial, setting the stage for the delicate texture these treats are known for.
Butter and water come into play to balance richness with structure. Melted butter lends a luxurious depth, while cold water helps keep the batter light and easy to work with. This combination results in a wafer that is buttery without being overly dense.
A touch of vanilla extract infuses the batter with subtle aromatic notes. Its gentle sweetness enhances the overall flavor profile without overpowering the wafer’s delicate nature.
Choosing the right flour is key. Sifted unbleached all-purpose flour ensures the batter remains smooth and lump-free, contributing to the wafer’s fine, crisp texture. The sifting process removes any clumps, promoting even cooking and a tender bite.
Step-by-Step Preparation Guide
Preheating the pizzelle maker is the first crucial step. A properly heated surface guarantees that the batter cooks quickly and evenly, forming a wafer that is golden and crisp rather than pale and soft.
Crafting the batter requires a gentle but thorough hand. Beat the eggs and sugar until pale and slightly thickened before slowly incorporating the water, butter, and vanilla. Gradually adding the sifted flour ensures a smooth, lump-free consistency, the hallmark of a well-made wafer.
Portioning the batter precisely, using about a tablespoon for each roll, ensures consistency in size and thickness. Cooking for 30 to 60 seconds allows the wafers to develop their characteristic golden hue. Timing is everything to achieve the perfect crunch without overcooking.
Rolling the wafers while they are still warm and pliable is essential. They should be lifted carefully from the pizzelle maker and swiftly rolled into a tight cylinder. Acting quickly prevents cracks and preserves the delicate texture.
Cooling on a wire rack is vital for setting the structure. Once cooled, the wafers firm up into their final crisp form. Storing them properly ensures they retain their signature crunch for days to come.
Recipe Tips & Frequently Asked Questions
How to prevent wafers from becoming soggy
Store the wafer rolls in a traditional tin container, allowing slight exposure to air. Avoid airtight containers, which trap moisture and compromise the crispness.
Techniques for rolling without cracking
Roll the wafers immediately after lifting them from the pizzelle maker. Work swiftly and gently while they’re still warm and flexible.
Adjusting cooking time for different textures
For a lighter wafer, cook for the shorter end of the time range. For a deeper golden hue and extra crispness, extend cooking slightly, keeping a close eye to prevent burning.
Best storage practices to maintain crunch
Separate the wafer rolls from other types of cookies and store them away from humidity. A simple metal tin works best to preserve their delicate texture.
Can I make wafer rolls without a pizzelle maker?
While a pizzelle maker provides the traditional pattern and even cooking, a flat waffle cone maker can be a good alternative.
How do I keep the rolls crisp in humid weather?
Store with a silica gel packet or bake them slightly longer to reduce moisture, ensuring they remain crisp even when humidity is high.
Can the batter be made in advance?
Yes, the batter can be made a few hours ahead and stored in the refrigerator. Stir gently before use to restore consistency.
What’s the best way to ensure uniform size?
Use a small cookie scoop or measuring spoon for consistent batter portions, and roll each one to the same tightness for even appearance.
What to Serve With This Recipe
Pairing these crisp wafer rolls with coffee or a rich espresso enhances their subtle sweetness and provides a satisfying contrast of textures. They’re a natural companion for a mid-morning or afternoon break.
For a more indulgent treat, use the wafer rolls as edible scoops for ice cream. Their crisp texture pairs beautifully with cold, creamy ice cream, adding an elegant crunch to every bite.
A fresh fruit platter also complements their delicate sweetness. Berries, sliced apples, or stone fruits create a refreshing counterbalance to the buttery wafers, perfect for a light dessert offering.
For special occasions, arrange the wafer rolls artfully on a serving platter alongside small bowls of whipped cream or fruit coulis. They add a touch of class to afternoon teas, dessert buffets, or celebratory spreads.
Creative Variations
Infusing the batter with flavors like citrus zest, almond extract, or a hint of cocoa powder can add new dimensions to the classic recipe. Each variation offers a delightful twist without overshadowing the wafer’s signature crispness.
Dipping the ends of the wafer rolls in melted dark or white chocolate provides a striking visual appeal and a rich flavor contrast. Sprinkle the wet chocolate with crushed nuts or festive sprinkles for a decorative touch.
Filling the wafer rolls transforms them into a more decadent dessert. Pipe sweetened whipped cream, mascarpone, or hazelnut spread into the hollow center for a luxurious upgrade that remains light and inviting.
Crisp Wafer Rolls are the embodiment of understated elegance—simple to make yet impressive to serve. Their delicate crunch and subtle sweetness make them endlessly versatile, whether enjoyed plain, filled, or paired with favorite accompaniments. With a few creative variations, these classic treats can easily be personalized, making them a go-to recipe for any celebration or quiet moment of indulgence.
Ingredients
3 large eggs
½ cup granulated sugar
8 tablespoons butter, melted and cooled
½ cup cold water
½ teaspoon vanilla extract
1 cup sifted unbleached all-purpose flour
Instructions
Begin by preheating your pizzelle maker according to the manufacturer’s guidelines. Meanwhile, prepare the batter.
In the bowl of a stand mixer—or using a handheld mixer—beat together the eggs and granulated sugar until the mixture becomes pale and slightly thickened, a sign that air has been incorporated for a lighter texture.
Gradually add the cold water, followed by the cooled melted butter and vanilla extract, mixing gently to combine. Sift in the flour and continue mixing on a low speed until the batter is silky and free of lumps.
Once the pizzelle maker is fully heated, drop approximately 1 tablespoon of batter onto the center of the hot plate. Close the lid and cook following the manufacturer’s timing instructions, generally between 30 to 60 seconds, or until the wafer is golden and crisp.
Carefully lift the wafer using a fork or a silicone spatula to avoid breaking its delicate structure. While still warm and pliable, roll the wafer into a tight cylinder and place it on a wire rack to cool completely, where it will crisp up beautifully.
For best results, store the finished wafer rolls in a traditional tin container. Avoid airtight storage and keep them separate from other cookies; a slight exposure to air ensures they maintain their irresistible crispness.
Crisp Wafer Rolls Recipe
Ingredients
- 3 large eggs
- ½ cup granulated sugar
- 8 tablespoons butter melted and cooled
- ½ cup cold water
- ½ teaspoon vanilla extract
- 1 cup sifted unbleached all-purpose flour
Instructions
- Begin by preheating your pizzelle maker according to the manufacturer’s guidelines. Meanwhile, prepare the batter.
- In the bowl of a stand mixer—or using a handheld mixer—beat together the eggs and granulated sugar until the mixture becomes pale and slightly thickened, a sign that air has been incorporated for a lighter texture.
- Gradually add the cold water, followed by the cooled melted butter and vanilla extract, mixing gently to combine. Sift in the flour and continue mixing on a low speed until the batter is silky and free of lumps.
- Once the pizzelle maker is fully heated, drop approximately 1 tablespoon of batter onto the center of the hot plate. Close the lid and cook following the manufacturer’s timing instructions, generally between 30 to 60 seconds, or until the wafer is golden and crisp.
- Carefully lift the wafer using a fork or a silicone spatula to avoid breaking its delicate structure. While still warm and pliable, roll the wafer into a tight cylinder and place it on a wire rack to cool completely, where it will crisp up beautifully.
- For best results, store the finished wafer rolls in a traditional tin container. Avoid airtight storage and keep them separate from other cookies; a slight exposure to air ensures they maintain their irresistible crispness.