


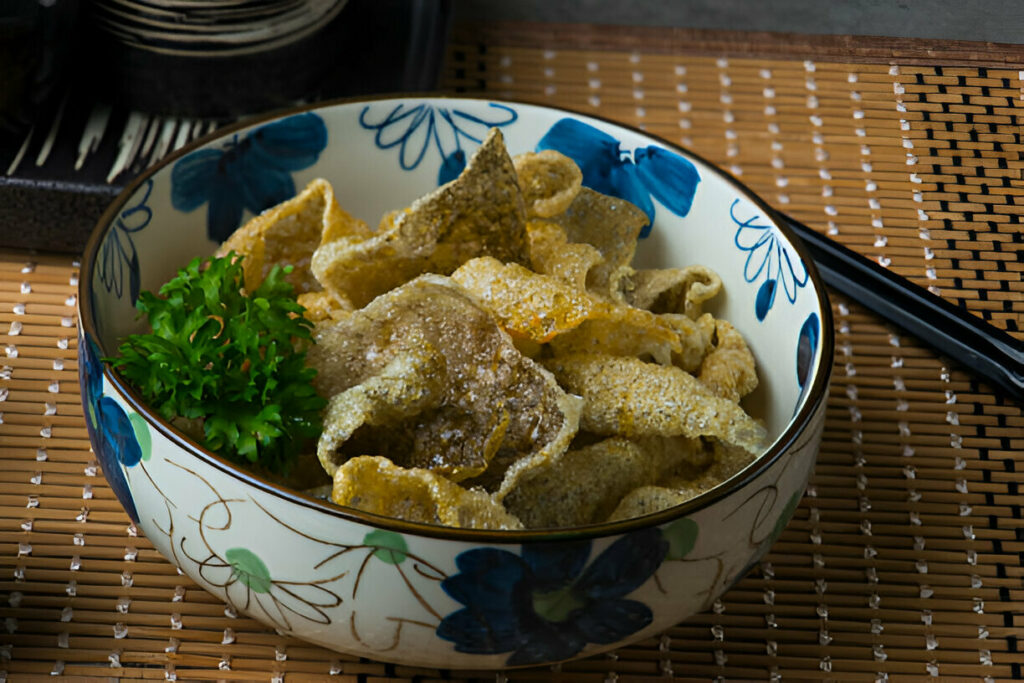
Crispy Fried Salmon Skin is the kind of snack that demands attention. Each bite shatters like glass, delivering a rich, savory crunch that’s impossible to forget. It’s bold, textural, and deeply satisfying—making it the perfect appetizer or side to elevate any seafood spread.
Ingredients Breakdown
When choosing fish skins, freshness is non-negotiable. Salmon works beautifully, but any thick, fatty-skinned fish will do. Look for skins that are well-trimmed, free of bruising, and thick enough to withstand boiling and frying without falling apart. The richer the fat layer beneath the skin, the more dramatic the puff during frying.
Scaling is a small step with big payoff. Even one missed scale can ruin the texture, getting caught in your teeth and ruining that crispy bite. Take time to go over the surface with a knife or fish scaler, making sure every scale is removed.
Salt isn’t just for seasoning here—it plays a crucial role in the blanching process. A few tablespoons in the boiling water not only seasons the skins but helps tighten the proteins and draw out any residual fishiness, ensuring a cleaner flavor profile when fried.
The choice of frying oil matters more than you think. Peanut oil is ideal for its neutral flavor and high smoke point, which allows for an even, blistering crisp without risk of burning. Canola, sunflower, or rice bran oils are also great alternatives.
Once out of the fryer, seasoning is where you can really make things pop. A classic sprinkle of fine sea salt works wonders, but spice blends like Tajín or togarashi add dimension and brightness. Crushed seaweed, garlic powder, or citrus zest can take the flavor even further.
Step-by-Step Preparation Guide
To start, lay your fish skins flat and examine both sides carefully. Use kitchen shears to cut the skins into large palm-sized pieces. Uniformity ensures even frying later on, and manageable sizes make scraping and drying easier.
Blanching the skins in boiling salted water is the secret to cleaner flavor and better texture. A minute is all most skins need, but larger varieties like sturgeon or shark benefit from a few extra minutes. You’ll know they’re ready when they firm up and change color slightly.
Once blanched, lay the skins meat-side up. This is the moment to remove any fat or flesh clinging to the underside. A butter knife works best for this delicate job—glide it gently over the surface, scraping away any soft tissue until only clean, translucent skin remains.
Next comes dehydration. This step is essential for creating that iconic puff when fried. If using a dehydrator, set it to 140°F and dry until the skins are completely brittle. In a pinch, an oven set to low with convection will do the trick. Flip the skins occasionally to ensure even drying.
Once the skins are dry enough to snap in half, they’re ready to fry or store. Heat your oil to 360°F and fry the skins one or two at a time. They’ll puff within seconds. Let them cook for around 30 seconds or until the bubbling slows down and the color deepens to golden brown.
Right out of the oil, sprinkle the hot skins with salt or your seasoning of choice. This is the moment when the seasoning sticks best. Serve hot and crisp for the ultimate snack experience.

Recipe Tips & Frequently Asked Questions
How to tell if the skins are fully dehydrated:
They should be brittle and snap cleanly when bent. Any remaining flexibility means they’re not ready.
Tricks for achieving a consistent puff:
Ensure complete dryness before frying and maintain a steady oil temperature. Skins with too much residual moisture won’t puff properly.
Avoiding soggy or chewy results:
Never fry damp or under-dehydrated skins. Moisture is the enemy of crisp.
How to store prepared skins before frying:
Keep fully dried skins in an airtight container in the fridge for up to 3 days, or freeze for longer.
The best way to reheat leftover fried skins:
Use an oven or air fryer to restore crunch. Avoid microwaves, which will make them chewy.
Can I use skins from fish other than salmon?
Yes—try trout, sturgeon, or even halibut. Just adjust boiling time for thickness.
How long can dried skins be stored before frying?
Up to a week in the fridge, or a month in the freezer, if completely dry.
Do I need a dehydrator, or will an oven work?
An oven works fine—just keep it low and slow, ideally with convection.
Can I skip boiling the skins?
It’s not recommended. Boiling helps tighten the skin and removes impurities that could affect flavor and texture.
Is it necessary to remove all the fat from the skin?
Yes, for the best texture and to avoid splattering when frying.
What to Serve With This Recipe
A good dipping sauce can take crispy salmon skin to another level. Try creamy garlic aioli, zesty soy-lime dipping sauce, or a silky miso mayo for contrast. Each one brings a different vibe—richer, tangier, or more umami-forward.
This snack pairs beautifully with drinks. A cold, hoppy beer brings balance, while sparkling sake or citrus-forward cocktails amplify the crunch and salt.
Use these crispy bites as part of a larger seafood feast. They fit seamlessly into platters with fried shrimp, calamari, or even battered oysters. They’re also fantastic scattered over fresh greens or a poke bowl for a satisfying crunch.
For a gourmet twist, break up the skins and use them as garnishes. Top a bowl of creamy corn chowder, spicy ramen, or soba noodles for added texture and depth. They also work well over sushi rolls in place of crispy onions.
Creative Variations
Flavored seasoning opens up endless possibilities. Dust freshly fried skins with nori powder, smoky paprika, or wasabi salt for a flavor punch that matches your menu or mood.
For a unique sweet-and-savory contrast, drizzle the skins with a touch of honey and crushed chili flakes. The caramelized edges and slight heat add a bold personality.
Crumble them over rice bowls or grain salads to add crunch. They also shine as toppers for deviled eggs, roasted vegetables, or creamy pasta dishes.
Use puffed skins as mini taco shells. Fill them with tuna tartare, avocado, or pickled radish for a high-impact appetizer that’s as stunning as it is delicious.
Crispy Fried Salmon Skin transforms an often-discarded ingredient into something exceptional. It’s a smart, flavorful, and sustainable snack that never fails to surprise. Whether served on its own, dressed up with toppings, or repurposed in creative ways, this dish brings bold crunch and unforgettable character to the table.

Ingredients
Oil, for deep frying
Salt, to taste
1 pound fish skins (ensure they are fully scaled)
Instructions
Begin by thoroughly inspecting the fish skins to ensure all scales have been removed. Use your fingers or a knife to pick off any lingering scales. Once clean, cut the skins into large, manageable pieces—roughly the size of your palm works best.
Bring a medium pot of water to a rolling boil and generously season it with salt—about two to three tablespoons. Gently place the fish skins into the boiling water. Allow them to cook for 1 minute, or up to 5 minutes for particularly thick-skinned varieties such as sturgeon or shark. Most standard fish skins will be ready in about a minute.
Carefully remove the skins from the boiling water and place them meat-side up on a clean cutting board. Using a butter knife, slowly and gently scrape off all the attached meat and fat from the underside. This step requires a delicate hand to avoid tearing the skin. It’s alright if a few rips occur—they won’t affect the final texture too much.
Once cleaned, lay each skin flat on a dehydrator tray. Dry the skins thoroughly until they become brittle. This can be done using a dehydrator set to around 140°F, though slightly higher or lower temperatures will also work. If a dehydrator isn’t available, a convection oven on its lowest setting is a suitable alternative.
After the skins are completely dry and crack when bent, they’re ready for frying or can be stored in the refrigerator for a few days. Freezing is also an option for longer storage. When ready to fry, heat oil to 360°F. Fry the skins one or two at a time—within seconds, they’ll puff up. Let them cook until the bubbling subsides, about 30 seconds in total.
Immediately after frying, season with salt or your favorite blend. A sprinkle of Mexican Tajín adds a zesty, tangy finish that complements the rich crispness perfectly. Serve immediately for maximum crunch.

Crispy Fried Salmon Skin Recipe
Ingredients
- Oil for deep frying
- Salt to taste
- 1 pound fish skins ensure they are fully scaled
Instructions
- Begin by thoroughly inspecting the fish skins to ensure all scales have been removed. Use your fingers or a knife to pick off any lingering scales. Once clean, cut the skins into large, manageable pieces—roughly the size of your palm works best.
- Bring a medium pot of water to a rolling boil and generously season it with salt—about two to three tablespoons. Gently place the fish skins into the boiling water. Allow them to cook for 1 minute, or up to 5 minutes for particularly thick-skinned varieties such as sturgeon or shark. Most standard fish skins will be ready in about a minute.
- Carefully remove the skins from the boiling water and place them meat-side up on a clean cutting board. Using a butter knife, slowly and gently scrape off all the attached meat and fat from the underside. This step requires a delicate hand to avoid tearing the skin. It’s alright if a few rips occur—they won’t affect the final texture too much.
- Once cleaned, lay each skin flat on a dehydrator tray. Dry the skins thoroughly until they become brittle. This can be done using a dehydrator set to around 140°F, though slightly higher or lower temperatures will also work. If a dehydrator isn’t available, a convection oven on its lowest setting is a suitable alternative.
- After the skins are completely dry and crack when bent, they’re ready for frying or can be stored in the refrigerator for a few days. Freezing is also an option for longer storage. When ready to fry, heat oil to 360°F. Fry the skins one or two at a time—within seconds, they’ll puff up. Let them cook until the bubbling subsides, about 30 seconds in total.
- Immediately after frying, season with salt or your favorite blend. A sprinkle of Mexican Tajín adds a zesty, tangy finish that complements the rich crispness perfectly. Serve immediately for maximum crunch.